LipSync Documentationbeta
Welcome to the new online documentation for LipSync Pro and Lite.
This area will be updated with new information and tutorials when available.
Welcome to the new online documentation for LipSync Pro and Lite.
This area will be updated with new information and tutorials when available.
At the top of the AutoSync Window, a list of every AutoSyncPreset asset in your project is shown. Selecting one of these presets will load its modules into the modules list at the bottom. The preset's description is also shown in a box immediately underneath the presets list.
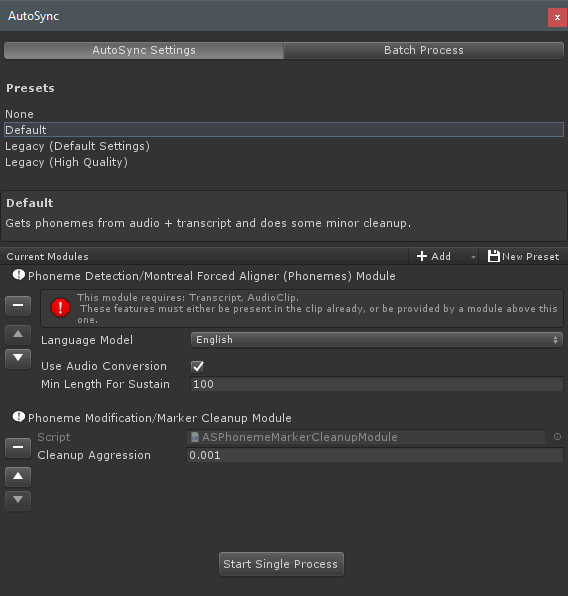
You can also create a new preset from the current modules list by clicking the New Preset button. This will open up a
save file dialog, and then save a new preset asset containing the full list of modules at the bottom of the window, plus the current settings for each.
Note: When saving a new preset, attempting to save somewhere outside the current project's Assets folder will not work.
The Modules list at the bottom of the window shows the currently loaded set of modules. This can be either loaded in from a preset, or manually put together. Be aware that order is important - when the Start Single Process button is pressed each module will be executed in turn, starting from the top and working down. This is also how module compatibility is determined. If a module requires phoneme markers to be present in order to work, it first checks if the clip currently in-progress in the Clip Editor contains phoneme markers, then the output features of each module above it in the list. This allows you to build a chain of modules that can each use features added by other modules.
If a module requires a feature that isn't found in this way, an error message is displayed above that module in the list, noting the necessary features. You can add a new module by clicking the Add button. This will bring up a drop-down list of all modules available in the project - selecting one will add it to the list. After a module is added, it can be moved around in the sequence by using the and buttons to the left of the module, or removed from the sequence by using the button.
At the very top of the window is a toggle to select between AutoSync Settings and Batch Process. When Batch Process is chosen, the window will show the batch processor instead. This can also be accessed straight from the Clip Editor from the AutoSync > Batch Process menu item. The batch processor lets you run AutoSync on any number of clips one after another, without additional input.
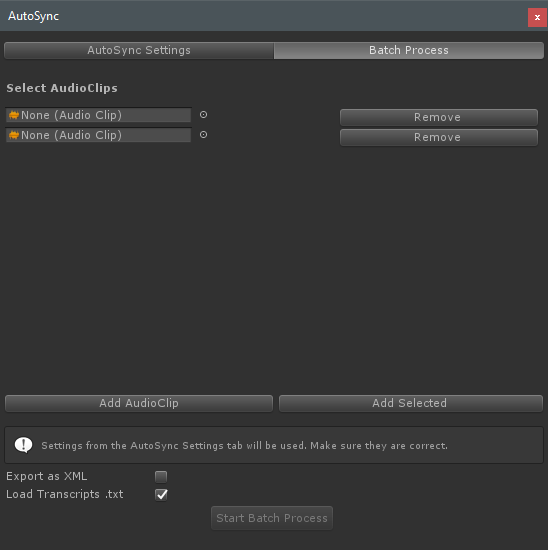
By default the Select AudioClips list here will be empty. You can add a new empty row to this list by clicking the Add AudioClip button. You can also select one or more AudioClips in the Project window, then click Add Selected to add them all to this list. If you've added blank rows, or you wish to replace one of the clips, you can do so using the AudioClip object picker on each row. The Remove button on each row will remove that row from the list.
Once you've chosen all the clips you wish to process, you can click the Start Batch Process button to being processing. There are two additional options above this button:
Export as XML - if checked, an .xml file containing the data will be exported for each file instead of a normal LipSyncData .Asset file. This can be useful if you want to
do additional processing on the files in an external application.
Load Transcripts .txt - if checked, AutoSync will attempt to load a transcript for each AudioClip by looking for a .txt file with the same name and in the same folder as the
audio file. This may be necessary if you're using the Montreal Forced Aligner module, which requires a text transcript to generate phonemes.
The AutoSync processes used are determined by the AutoSync Settings tab - see the top of this page for details.
Back Next